")
How do you make something special out of the over-familiar? Steve Davey helps you capture the world’s icons on camera
Judging the Icon category of the Wanderlust Travel Photo of the Year, we see many creative images of some of the world’s great monuments. We also see our share of fairly dull, representational photos and a lot of ‘there’s-no-other-category-to-enter-it-in-so-I’ll-call-it-an-icon’ shots... So what makes a winning icon image?
When I got started in this game, 25 years ago, it was a lot easier. Quite simply, fewer people had travelled to those far-flung places, so if you wanted to impress someone with your icon photography, all you really had to do was go there and hit click.
Now it seems that everyone has travelled to the same places. Show someone your below-average snaps of Mali’s Grand Mosque of Djenne and they’re probably thinking, ‘Fine, but Great Aunt Gertrude took a better one last year’.
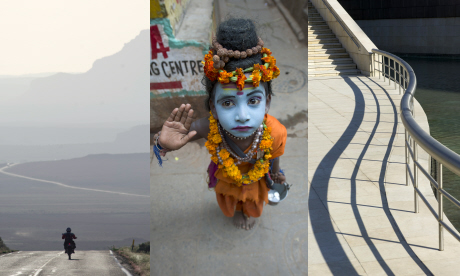
The best way to avoid returning with endless dull shots of the world’s iconic monuments is to stop and think about how to try to photograph things in a different way. Pre-visualise the image before you rush in. Look for different angles; shoot from different places; stop to think about how you could present your icon in a way that will stand out.
It’s also worth being perverse: try to avoid times when icons will be swamped. Not only will you avoid getting lots of other people in your shots, but the light may be better. Most people turn up after a leisurely breakfast and then shoot their pictures in the late morning, in harsh light; instead, get there early.
Or get there late: in the world’s renowned sunrise spots – Angkor Wat, Bangkok’s Grand Palace – go back for sunset, when the light is lovely but there’s no one there. Thinking against the crowd will make your photos stand out from them.
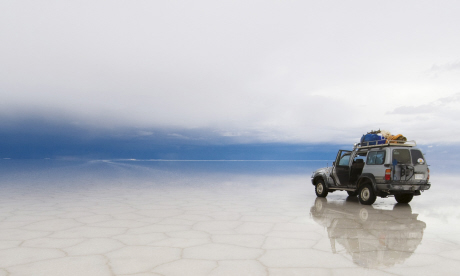
1. Wait for the light
Light can make or break your pictures. Try shooting just after sunrise or before sunset to get the warmest, most evocative light. Often you’ll also be rewarded with fewer people in your way. Even if the weather’s bad, this can produce dramatic images.
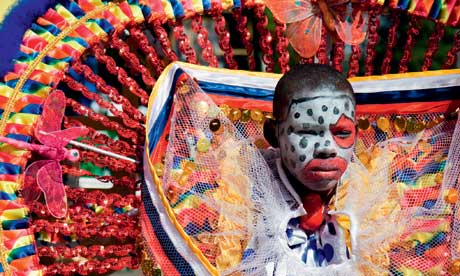
2. Put people in the picture
There are fewer than 1,000 sites on the Unesco World Heritage list, but well over six billion people on the planet. Lob a person into the mix to help produce something original.
3. Use creative techniques
Create a more visual image. If there’s any movement in the image, using a slow shutter speed can introduce blur. If there’s no movement in the scene, exploit depth of field – either by using a wide aperture to give a shallow depth of field, or a small aperture to render the whole scene in focus.
4. Experiment with angles
Looking at familiar subjects with a creative eye can produce pictures that stand out – such as this shot of Ahu Tongariki, Easter Island. Employ an extreme composition to fill the scene with a dramatic sky, or change the viewpoint or angle to combine your icon with an interesting object or foreground.
1. If you only remember one thing…
Pre-visualise! Don’t rush in and snap away – stop and think first. Look for interesting angles, imaginative combinations and creative photographic techniques to make your work stand out.
2. Tech tip
Don’t allow your camera to set the aperture and shutter speeds: wrestle back control and work in the extremes. Select the aperture to maximise or minimise the depth of field, or use a super-slow shutter speed to blur people or create star trails by moonlight.
3. One for the kitbag
If you’re going to play with long shutter speeds etc, you’ll need a tripod. Not every icon permits their use (the Taj, for example), but if you’re allowed, you can increase your creative options. I use a carbon-fibre Manfrotto tripod, for lightness and stability.